 ch
ch English

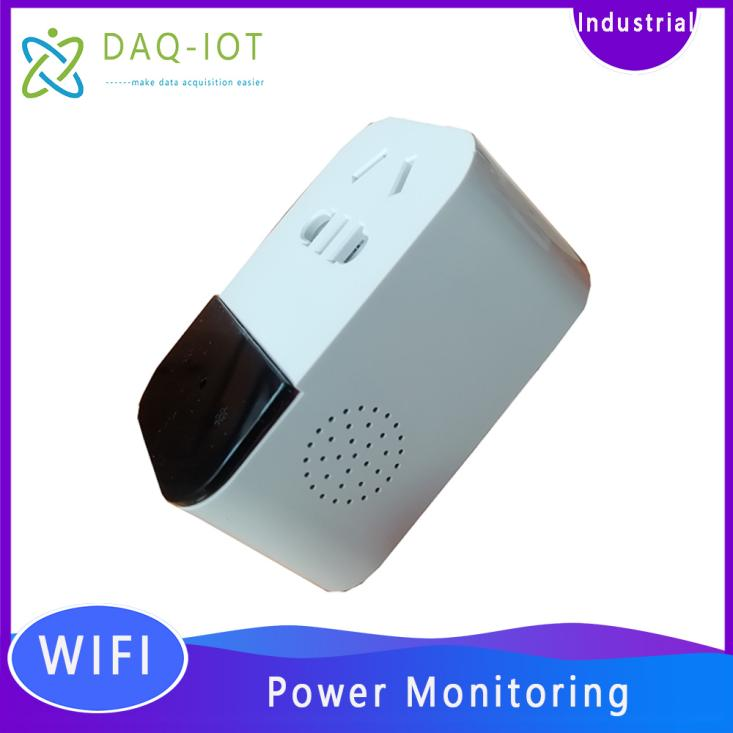
The DAQ-GP-SCWiFi Smart Metering Socket by Shucai IoT operates at 110~240VAC, supports currents of 10A and 16A, and is compatible with 2.4G WiFi. Power can be controlled manually or via the cloud to turn on/off, with real-time status and metering data queries, scheduled data uploads, support for multiple MQTT servers, and WiFi reconnection after disconnection. Parameters can be configured via the built-in webserver, suitable for remote control and energy consumption monitoring scenarios.
Application scenarios include homes, offices, and more. It supports remote control of appliances and energy consumption monitoring, suitable for device management and data collection in both intranet and public network environments.
Our company solemnly promises:
When you purchase our product, you receive not only the device but also meticulous and attentive technical support services !!! ( =^_^= )
For all purchases of our wireless products, we provide free remote guidance and remote configuration debugging services, delivering data to the cloud platform designated by the user.
We offer free IoT solution consultation services!
1) Operating Voltage: 110~240VAC.
2) Maximum Output Current: 16A.
3) Dimensions: 74×43×33 mm.
4) Ambient Temperature: -20~60℃.
5)Wifi:2.4G 802.11B/G/N。
6) Built-in web server for convenient user configuration of socket parameters.
7) The socket can be manually powered on and off via the 'Settings/Manual' button.
8) The socket can be controlled via the cloud to power on/off, and its status and metering data (Voltage, Current, Active Power, Apparent Power, Power Factor, and Cumulative Energy, e.g.: POWERON,223,0.067,0.0, 15.1.0.00,0.000,29.7)。
9) The socket’s internal temperature can be read via the cloud. It monitors operation and periodically uploads the socket’s switch status and metering data (switch status, Voltage, Current, Active Power, Apparent Power, Power Factor, Cumulative Energy, and Socket Temperature, e.g.: POWER ON,223,0.067,0.0,15.1.0.00,0.000,29.7), with an interval of 0 to 65,535 seconds, where 0 means no upload.
10) Supports Baidu Cloud IoT.
11) Supports general public MQTT brokers, such as mqtt.eclipse.org, mq.tongxinmao.com, and others.
12) Supports commonly used MQTT brokers including mosquitto, emqx, and Apache Apollo.
13) Supports self-built MQTT brokers within the local network for controlling sockets on the same local network.
14) Supports self-built public MQTT brokers for remote control of sockets outside the local network. Supports automatic reconnection after WiFi disconnection.
Note 1: The above-mentioned socket power-on refers to the socket itself being powered on, not the relay inside the socket being activated via manual button or MQTT command. After updating the socket parameter configuration, please power off and restart the socket to enable it to connect to the MQTT broker according to the configured parameters.
Note 2: After the socket powers on and restarts, the blue indicator light will flash slowly for 10 seconds. During this slow flashing period, a short press of the “Set/Manual” button will cause the blue indicator light to remain steady, and the socket will enter the parameter configuration mode. If the “Set/Manual” button is not pressed, after the blue indicator light flashes slowly for 10 seconds, it will switch to fast flashing and use the user-configured parameters to connect to the MQTT broker. Upon successful connection, the blue indicator light will remain steady.
The serial number of the metering socket is marked on the label at the bottom of the socket. Each socket has a unique serial number, which is the socket’s MAC address. Users access the socket via the serial number, so please keep it safe. In case of loss, you can use MQTT testing software to subscribe to the topic “#” to obtain the socket’s serial number. After powering on or restarting and successfully connecting to the server, the socket will use WifiSock/***********/Socket topic, sends its serial number to the MQTT broker.
Users can obtain the socket’s serial number by following these steps:
(1) Power on the socket. When the blue indicator light flashes slowly (within 10 seconds of power-on), briefly press the “Setup/Manual” button. The blue indicator light will remain steady, and the socket will enter parameter configuration mode.
(2) Connect to the socket’s built-in web server to configure the WiFi connection SSID and password, as well as the MQTT broker’s IP address, port, username, password, and data transmission interval. After updating, power off the socket. Refer to the socket parameter configuration.
(3) On a PC, open MQTT debugging software (such as MQTT Box or MQTT.fx), enter the MQTT broker’s IP address, port, username, and password, connect to the MQTT broker, and subscribe to the topic “#”.
(4) When the socket is powered on or restarted using the “Settings/Manual” button, after successfully connecting to MQTT, the socket’s Serial Number (MAC address) can be received on the MQTT debugging software, as shown in the figure below:
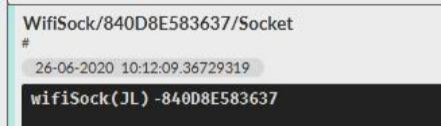
Publish Topic (publish): Subscribe Topic (subscribe):
WifiSock/***********/ Socket user/+/***********
Note:**********This is the socket’s Serial Number; the letters in the Serial Number must be uppercase. The Serial Number is also the socket’s MAC address. Users obtain the current status (powered on or off) and Metering Data of the socket by subscribing to the socket’s publish topic. The socket receives commands from users by subscribing to the topic user/+/***********Users need to use the topic user/+/***********to send commands to the socket.
The metering socket configuration parameters may include uppercase and lowercase English letters, numbers, and symbols; however, spaces are not permitted. The metering socket features a built-in web server for device parameter configuration. The procedure is as follows:
(1) Power on and restart the socket. The blue indicator light will flash slowly. Within 10 seconds, briefly press the “Setup/Manual” button. The blue indicator light will then remain steady, indicating the socket has entered parameter configuration mode.
(2) Use a laptop or a desktop computer equipped with a wireless network card to search for the wireless network SSID named WifiSock.
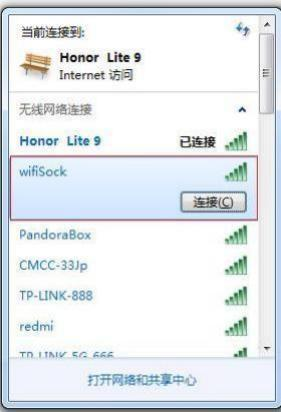
(3) Connect to WifiSock using the password: 12345678.
(4) Open a browser and enter the following address in the address bar: http://192.168.4.1, then press Enter.
(5) Configure the network, MQTT broker, and the socket’s username and password as shown below, then update the parameters.
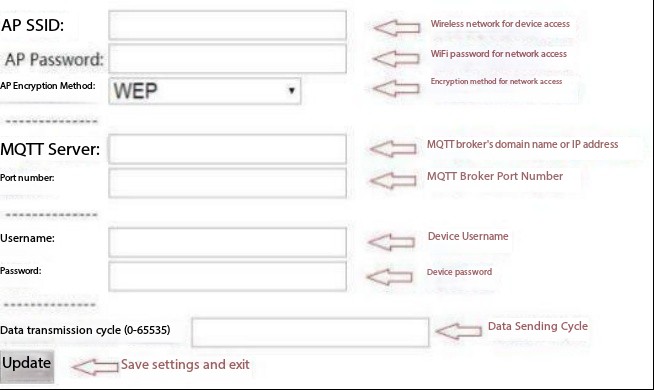
(6) Power off the socket, then power it on again without pressing the “Setup/Manual” button on top of the socket. After 10 seconds, the blue indicator light will flash rapidly. The socket will connect to the server based on the configured parameters. Under normal conditions, the connection will be established within several tens of seconds. A steady blue connection indicator light indicates the socket has successfully connected to the MQTT broker. Otherwise, please check the configuration parameters and reconfigure the socket.
The above-mentioned socket power-on refers to powering the socket itself, not controlling the internal relay via the manual button or MQTT commands. After completing the socket parameter configuration, please disconnect the socket’s power supply and restart it to enable connection to the MQTT broker according to the configured parameters.
It is recommended to first use the PC-based MQTT.fx tool to enter the MQTT server address, port number, socket username, and password to verify whether a successful connection with the server can be established. This will help confirm whether the MQTT server is operating correctly and whether the socket parameters are accurate.
(1) Install and start EMQX. The control panel port is 18083, and the listening port is 1883.
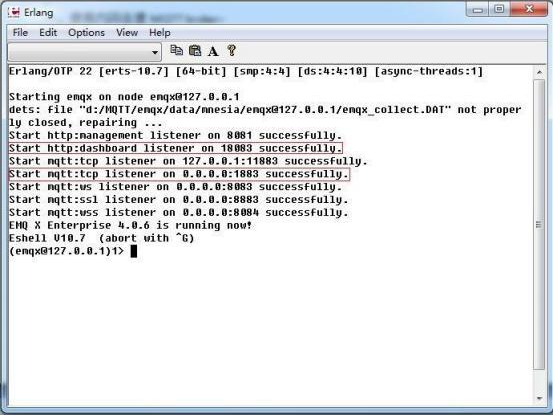
(2) Use ipconfig to find the local IP address of the machine running EMQX. The local IP address is 192.168.1.158.
(3) Put the WiFi socket into configuration mode and enter the device parameters as shown below: (Username: admin, Password: public)
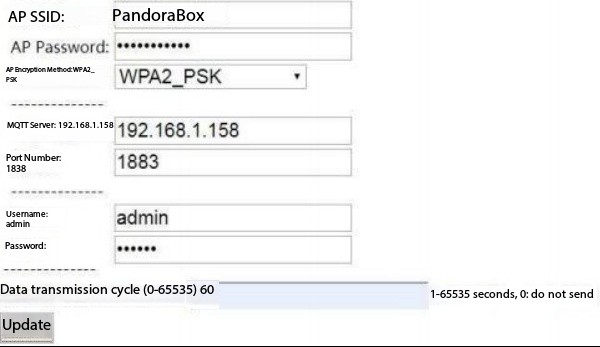
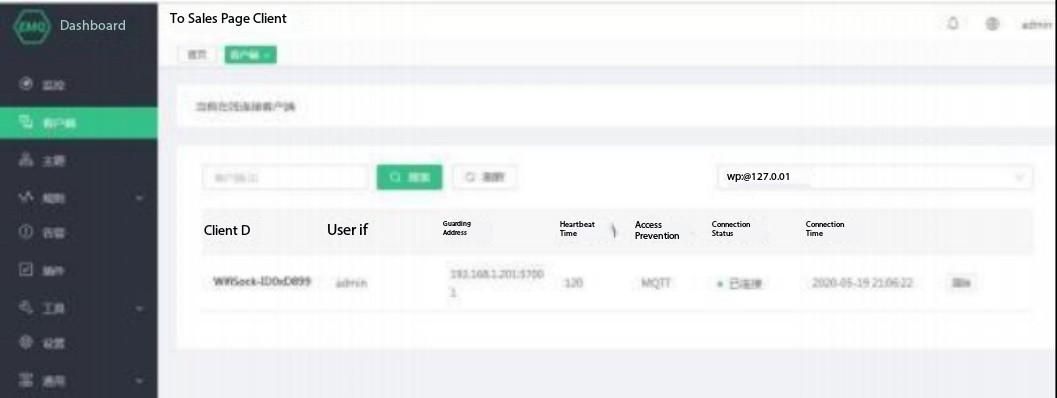
Click 'Update', power off the socket, then power it on again. The socket will restart. After several tens of seconds, the blue connection indicator light will remain steady. Enter 192.168.1.158:11803 in the browser and press Enter. You will see that the socket has successfully connected to the network.
Listening port: 1883
(1) Put the socket into configuration mode and enter the device parameters as shown below: (Username: admin, Password: public)
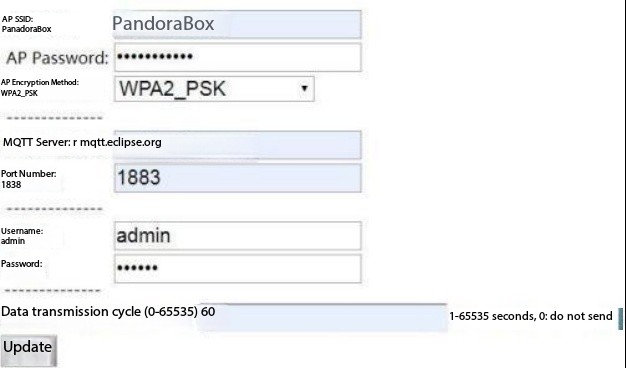
Click 'Update', power off, then power on the socket again. The socket will restart, and after several tens of seconds, the connection indicator light will remain steady, indicating successful connection to the server.
Note: The wireless network, server, and user account must be changed to your own.
(i) Register a Baidu Cloud account, create a data-type project, and save the server connection address, username, and password.
(ii) Create a topic as shown below:
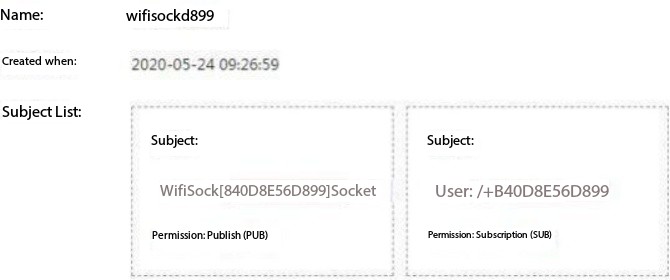
The red box contains the socket's serial number (MAC address). You can also use the wildcard '+' to receive messages from multiple sockets in batch.
(iii) Put the WiFi socket into configuration mode and enter the device parameters as shown in the figure below:
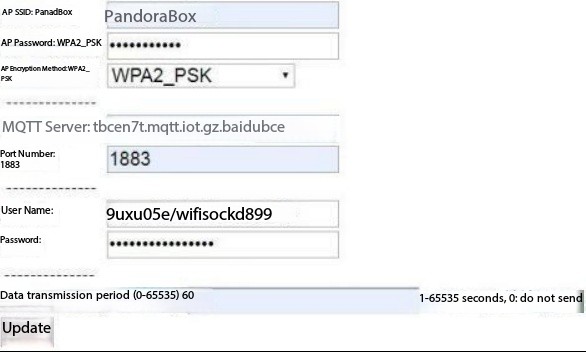
Click 'Update', power off, then power on the socket again. The socket will restart, and after several seconds, the blue connection indicator light will remain steady, indicating the socket has successfully connected to the server.
Note: The SSID, password, encryption method, and server IP address must be changed to your own.
Phone: 19936624847
Email: business@daq-iot.com
Website: www.daq-iot.com
Address: Building 10, No. 5, Lane 500, Gaoke East Road, Pudong, Shanghai
电话 : Facebook/wechat/WhatsApp:+8619936624847 LINE:daqiot
邮箱 : business@daq-iot.com
手机 : +8619936624847
地址 : Room 501-50, No.9, Lane 60, Hulan West Road, Baoshan District, Shanghai。Address : Apt. 8A, House 9, Road 105, Gulshan 2, Dhaka, Bangladesh
Copyright © 2025 DAQ-IOT All Rights Reserved. 沪ICP 2021036991号
