1 Product Overview
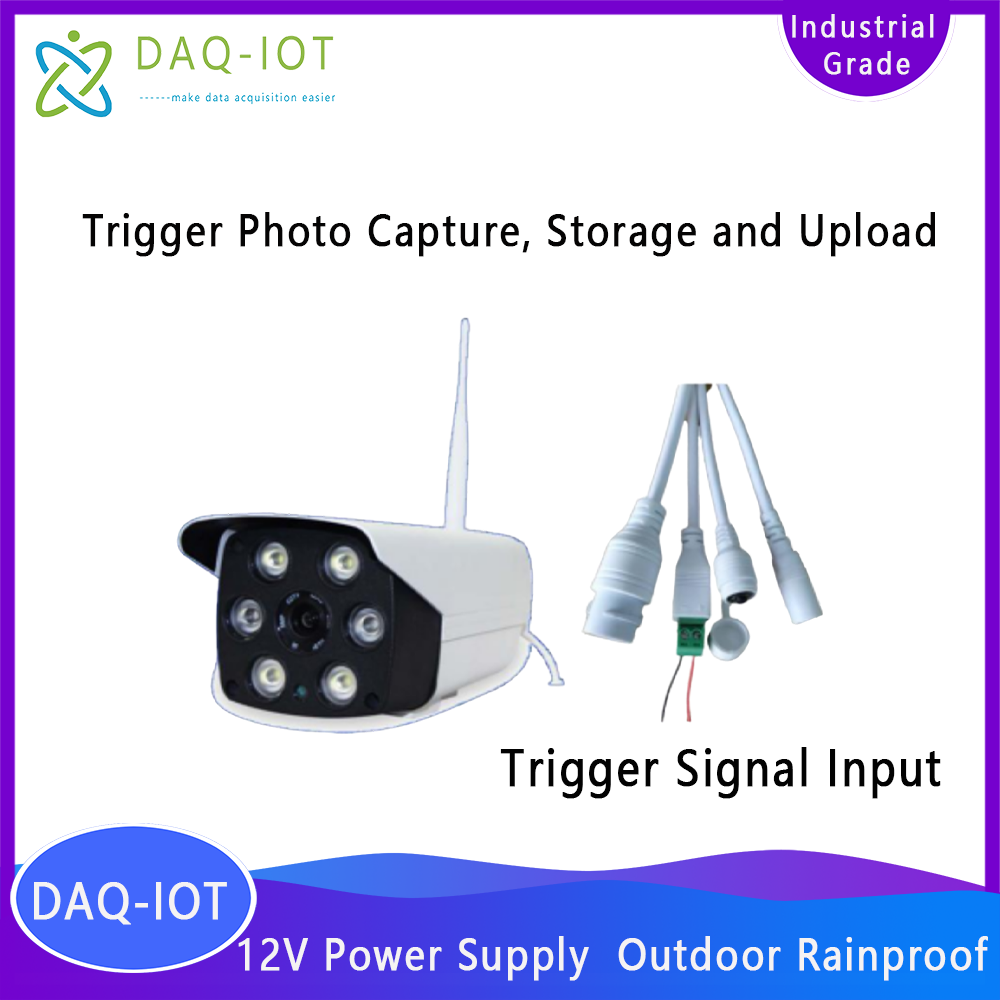
The SC-GP-CAMIO is a wireless camera based on 4G or WiFi, featuring switch signal relay-triggered timed photography and video capture with FTP and email photo upload, developed by Shanghai Data Acquisition IoT Technology Co., Ltd. It supports timed snapshots and event-triggered snapshots, making it widely applicable for instrument reading capture and recognition, as well as photo capture and video monitoring in agriculture, cultural relics, geotechnical, hydrology, and water conservancy fields.
This product supports network access via WiFi or Ethernet, timed photography, and uploading photos to a specified FTP Server or storing them on an SD card. When paired with a 4G wireless network card, it can be used in outdoor environments without WiFi coverage.
2 Service Philosophy
Our company in Zhengzhou guarantees:
You are purchasing not only a product but also comprehensive and attentive technical support services.
We provide free remote guidance and remote configuration and debugging services, transmitting data to the customer-designated server.
Free IoT solution consulting services are available!
3 Product Features and Specifications
3.1 Camera Parameters and Selection
Resolution: options of 2MP, 3MP, and 5MP; default is 2MP.
Lens: 2.8mm / 4mm / 6mm
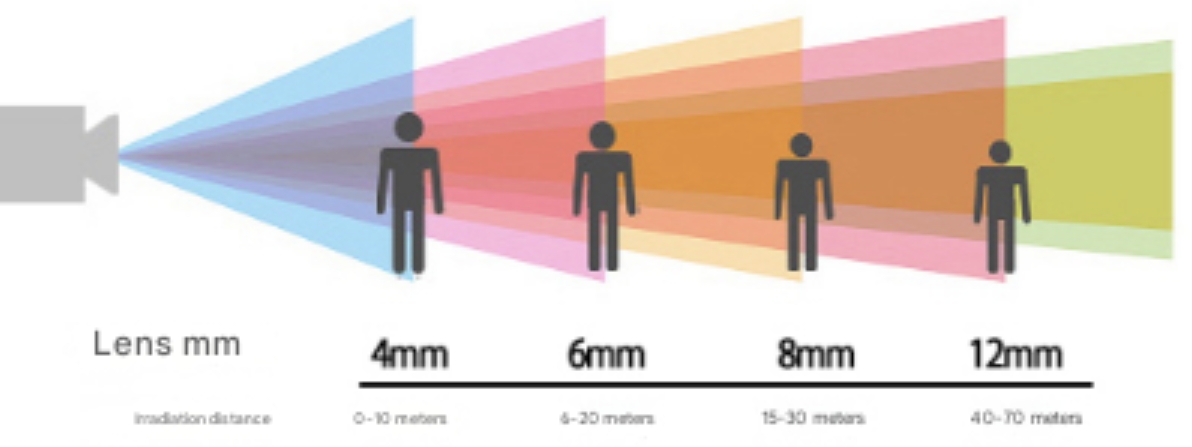
Lens Specifications | 2.8mm | 4mm | 6mm |
Monitoring Angle | 90° | 80° | 70° |
Monitoring Distance | 0~5m | 0~10m | 6~20m |
Memory Card Function: Supported
Power Supply: 12V DC
Weight: 0.35 kg
3.2 Electrical Characteristics
Power Supply Mode: 12V DC or Battery Powered
( Power Interface: DC5.5×2.1 mm Female Socket, Center Positive, Outer Negative )
3.3 Communication Characteristics
Default Network Mode: Ethernet/WiFi, 4G
Image Upload: FTP Server
3.4 Structural Features
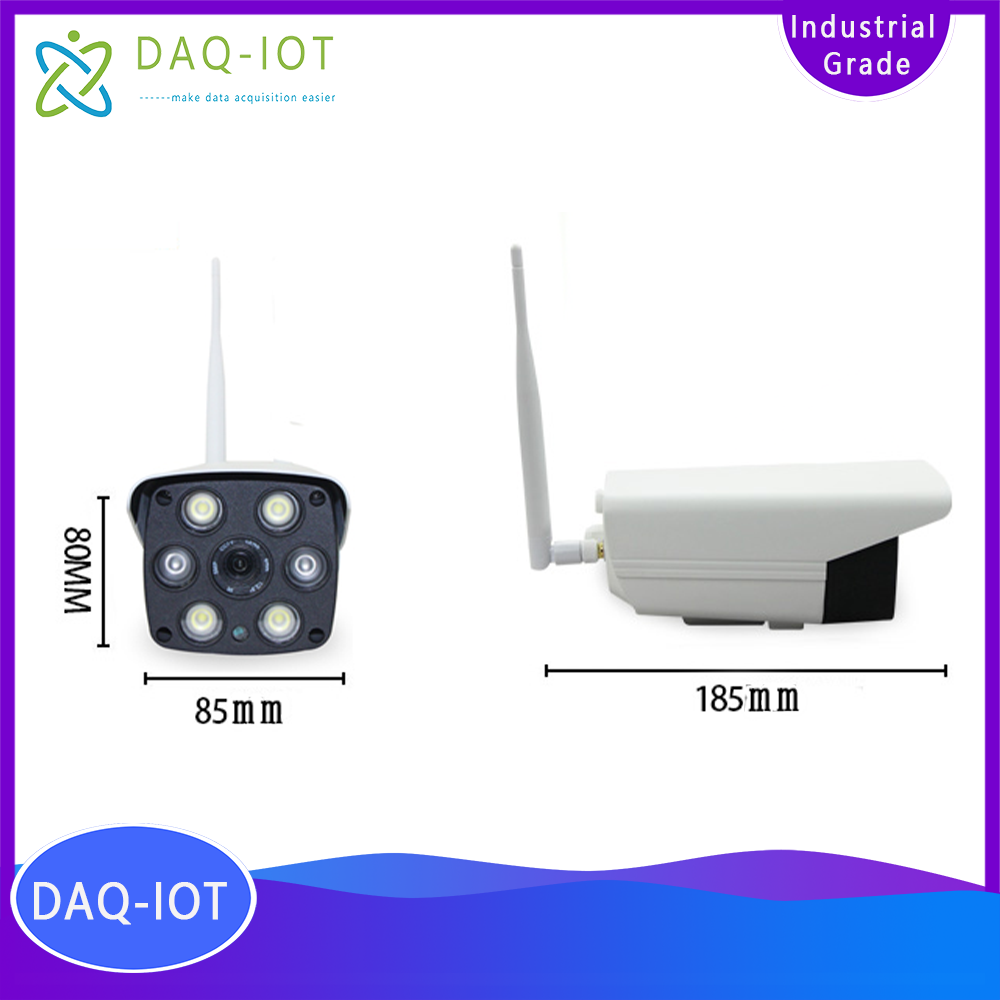
Antenna Type: Rubber Duck External Antenna
Material: PC Plastic (Housing)
Main Protection Rating: IP65
Dimensions: 185 mm × 85 mm × 80 mm
3.5 Operating Environment
Ambient Temperature: -30°C to 70°C, Humidity: 0–95% (Non-Condensing)
4 Component Matching
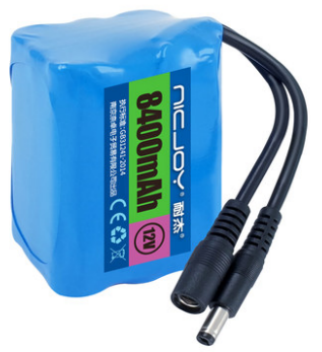
Includes 12V lithium battery pack |
|
Camera bottom mounting bracket
5 Core Product Advantages
u Simple installation and rapid deployment to facilitate quick implementation of IoT projects
u Compact size
u Rainproof design suitable for outdoor environments
u Built-in supplementary lighting suitable for nighttime photography
u Supports remote parameter configuration
6 Timed Photo Upload Settings
Allows setting of any time interval to capture photos stored on the SD card or uploaded to the FTP Server.
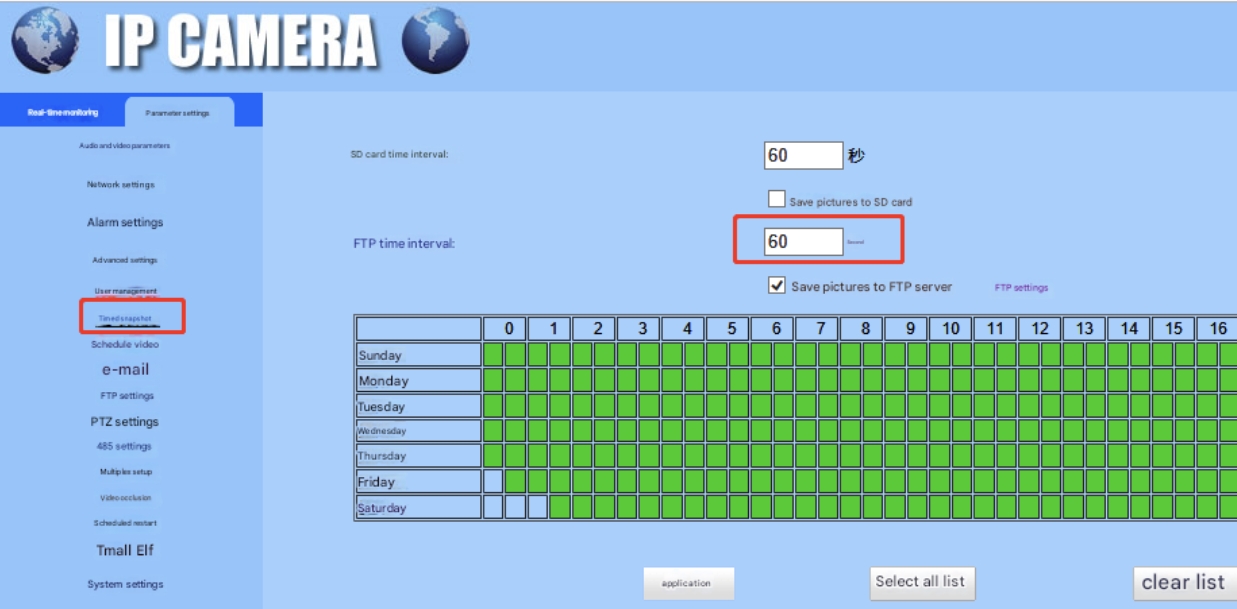
Timed photo interval setting
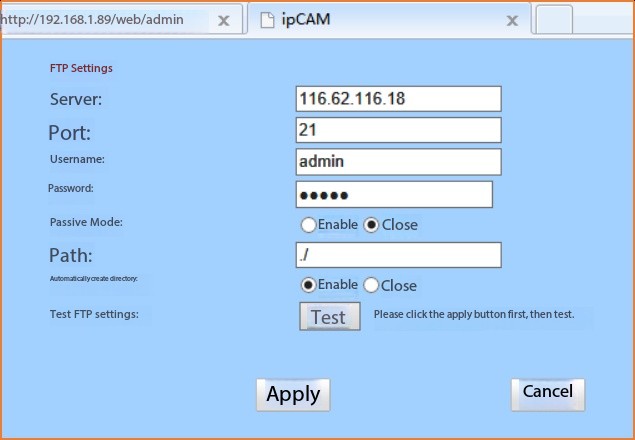
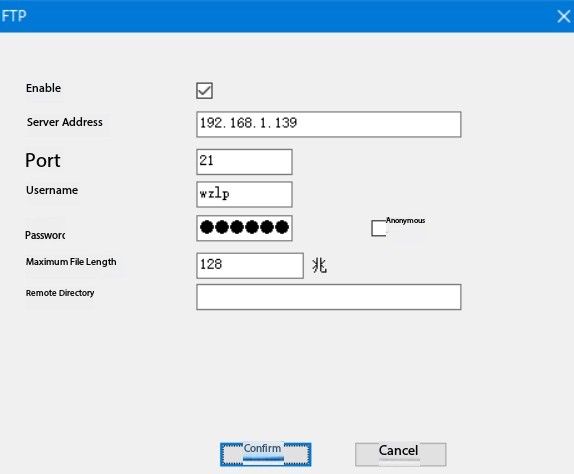
FTP parameter configuration
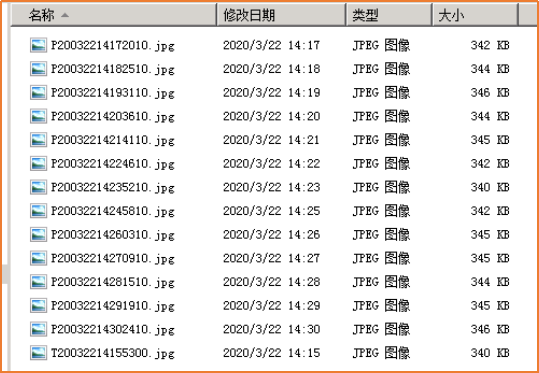
Example of image upload result
7 WiFi Camera Configuration
7.1 Connect to the computer and access the configuration interface.
Power on the camera and connect it to the computer via network cable.
Open the link https://xmeye.net/download/ocx/Active.exeDownload and install the browser control.
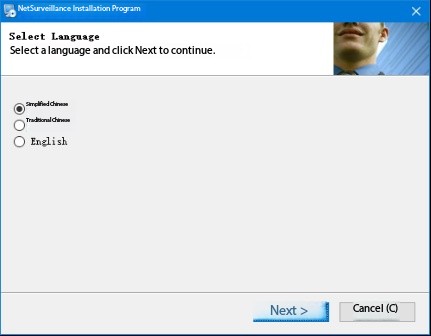
Check the IP address on the camera label; the default is 192.168.1.10 (refer to the actual camera label).
Set the computer IP to the same subnet as the camera (for example, set the computer IP to 192.168.1.211). Enter the camera IP in the browser and press Enter to access the login page. Enter the username (admin) and password (default is blank) (refer to the label on the camera for actual credentials) to log in to the configuration interface.
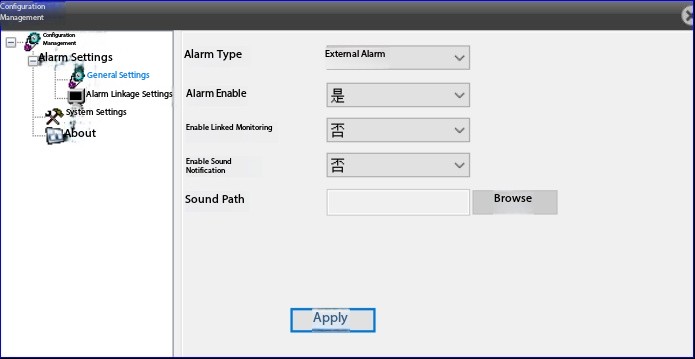
7.2 Trigger Photo Configuration.
Click the main menu Client Configuration and enable external alarm.
Navigate to Main Menu > Device Configuration > Settings > System Settings > Network Services, then double-click FTP to configure FTP parameters.
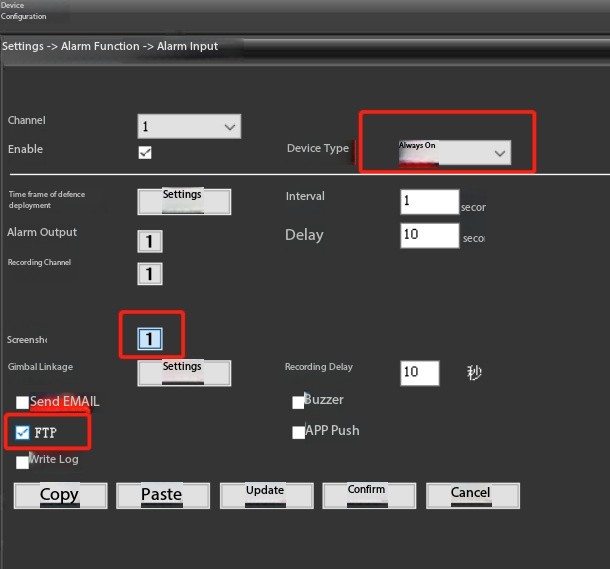
In the alarm input interface, configure the parameters as shown in the figure below.
7.3 WiFi Settings
Install the Monitoring Eye app on your mobile device, select Add Device, and configure WiFi.
App download link:

8 Application Cases
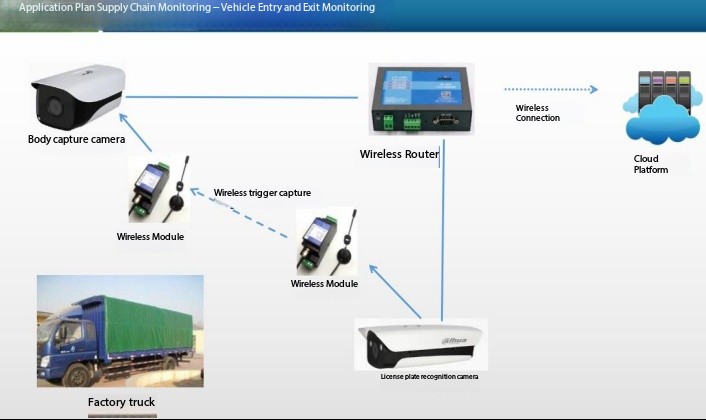
Factory Vehicle Access Monitoring
 ch
ch English